Monday, November 28, 2011

{Creating our GaLLerY}

Even though preparing for the Thanksgiving holiday(s) was a busy moment for us, we still managed to press forward with putting the nursery together. As I mentioned, I wanted our family to be able to see an almost finished room. One of the things that had seemed like a daunting task was getting up the energy to create a "gallery wall" above the changing table/dresser. I have had a vision in my mind for what I wanted it to look like, but wasn't sure how it was all going to come together. My sister has always been good at "vignetting" and putting things together that look like they belong without trying too hard, so I knew I was going to need her help.

Ever since I found out I was having a boy, I have been gathering eclectic wall art with my gallery wall in mind. I had quite a few items to choose from by the time we were ready to start, but at the end of the day, my sister and I narrowed it down and chose the images/pieces that we felt went together the best. Here are some of the items we chose....

In a previous post I showed you this vintage horse picture that I found at a flea market...
{I L-O-V-E him}

and I found this brass "V" (for our last name) at Urban Outfitters a while back...

I found this cute little canvas at a boutique called "The Daisy Shoppe" and loved that it was white and gray to go with my scheme.....

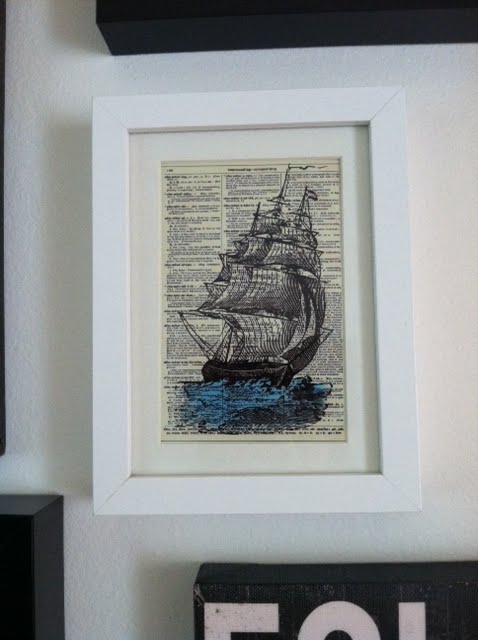
...and I had printed a couple of images that I found online that I thought would be fun additions....

I also stumbled upon some pretty cool greeting cards that went with the look/color scheme well (and had great messages to go along with them) so we added them in too....
(you can't really read the words, but they are well known quotes by Emerson, Lawrence, Shakespeare, etc.)

...and the main component to the whole thing (in my mind anyway) was a porthole sunburst mirror that I found at Homegoods several months ago...
Girl or boy this thing would have definitely made it into the gallery, no question about that! :)

Assembly:
The first step was to lay everything out so that we could find the arrangement that we liked best. I have a thing about gallery walls where I need there to be a high point and a low point somewhere around the middle-ish of the arrangement. All of the rest can be random and hap-hazard, but those two points sort of help to anchor the whole thing.

We sat on the ground and went through quite a few layouts before we found the best one....

...and we ultimately settled on this arrangement....
(see - the high is the rabbit and the low is the "follow your heart")

The next step was to transport that exact arrangement up onto the wall. Picture hanging (in my opinion) is hard in that the measurements must be precise and the back of every frame is so different (specifically where the picture-hanger part actually is located), sooooo....I of course enlisted the help of Ali's husband Josh, as he is our go-to handy man. He helped me construct the gallery piece by piece....


and got everything up and looking perfect....

:)

and here is the big picture of what we have going on on that side of the room.....

I am in L-O-V-E with how the gallery wall turned out!! Do you love it??! I absolutely LOVE it! :) It was so fun to come up with and now I can switch things out as I feel like it, or simply leave it just as it is!! Yay!! One more major project down, only a few more left to go. Our little guy is due in just over 2.5 months, and I am getting more and more excited every day!

Oh...also, I must shamelessly admit that my shopping addiction has definitely reached it's peak...
...and I am going to STOP now, as I think I am all set for the first few months that our little guy is here (LOL!!! Ya think??!). I am VERY picky, and I like what I like, but I . MUST . STOP!! haha!

Happy Monday everyone. I hope your week has started out great!
:)
-lisa

Sunday, November 27, 2011

{Thanksgiving = done! :) }

Thanksgiving is over and it was a BIG success! Well, I should actually say that both of the Thanksgiving's that I took part in are over and they were both a success. :)

We hosted Thanksgiving for Josh's family (23 ppl) on Thursday (his brother does the big cooking and the rest is potluck) and we hosted Thanksgiving for my family (over 30 ppl) on Saturday (my Mom does all of the cooking for this one). Both events went off without a hitch. I didn't take ANY pictures unfortunately (I was in "the zone"), but the food was SUPER yummy, the conversation was good, and there were plenty of kids running around and playing to make all of us smile.

Oliver's room was a BIG hit with the grown ups as well as the kids and I am so pleased that everyone likes what is going on in there. My little cousin Diego decided it would be fun to go "surfing" on Ollie's glider chair (ummmm....NO!) and my other cousin Alex took my "Cadillac-of-strollers" (that is in pristine new condition) out for a little spin (HA!!! - It was pretty hilarious!!). CRAZY kiddos! But the cutest kid moment of the day (as you saw on Ali's blog) is my niece Hayden, all curled up on the softest rug ever, asleep! So cute!

I plan to post a nursery reveal as soon as the final details come together!!! :) . . . . it shouldn't be long.

:)
Happy Sunday!

-L

Wednesday, November 23, 2011

{Thanksgiving}


Happy Thanksgiving Everyone!


I am thankful for SOOOO much this year. I feel so lucky to have so many wonderful people in my life (near and far) and to have so many exciting/amazing things on the horizon!! Today I am 7 months (28 weeks) pregnant with our little Oliver and I am feeling GREAT! I'm very much looking forward to eating lots of yummy food and spending some good quality time with my family!

I hope you have a wonderful Thanksgiving, 2011!


:)
-lisa

Friday, November 18, 2011

{DIY Crib Mobile}

Hi,

It's a gloomy fall day here and I am loving it! I'm ready for it to cool and off and I'm ready to start feeling festive! I have been trying to get as close to done with the nursery as I can these past few weeks because we are hosting Thanksgiving at my home this year, and I want the family to see what I've been up to :) (well, what we've been up to - it's definitely been a group effort). It may seem kind of silly to have Oliver's room completely done 2.5 months before he is due, but eh...better to be ahead than behind, right!?

One thing that I wasn't sure that I really wanted to incorporate into the nursery was a crib mobile. I like the idea, but haven't really seen too many out there that I actually like. Those plastic arm thingy's that hold dangling bears and play music - not really into those (sorry for those of you that have one like that - just being honest). I do agree however that it is a good idea to have something for the baby to look at while laying down, but I just wasn't sure what to do.

I stumbled upon a few ADORABLE mobiles on Etsy recently, and felt inspired....

I love this bird-on-twig mobile from Criswell Creations - ($75.00)

and this whale mobile from Southern Pearl Designs ($65.00)

and these fabulous art-deco inspired colorful mobiles from JennaEBee13 ($80.00)
(she even made it into the Pregnancy & Newborn Magazine's buyer's guide - awesome!!)

....and last but not least, I LOVE these adorable felt mobiles from hingmade ($80.00)
Cat & the Fiddle:
Woodland Creatures:
& Alice in Wonderland (which I would have totally purchased if I was having a girl - I absolutely LOVE it!!!)

All of these vendors are SERIOUSLY talented and have taken boring crib mobiles and made them amazingly fun and stylish!! They definitely have skills!! That being said, I wanted to give making one a shot, but am a TOTAL craft rookie (as I always say) and wasn't sure what to do. My friend Elizabeth (who is due with a baby girl 5 days after me :) ) is a talented girl as well, and after telling her that I knew she could totally knock one out of the park, she decided to tackle an adorable felt birdie mobile....

Birdies in progress...
...& the almost final product....
Isn't it adorable!!!!?? She has since added black-and-white music notes that add to it's adorableness (her husband is a musician, and her bedding is black, white, and pink, so the music notes are a perfect addition). I am in complete awe of her sewing skills and can't wait to see her mobile up above her beautifully girlie crib!!

Being that I CANNOT sew to save my life (ugh!), I knew I wanted to try my hand at something, but also knew that I would need Elizabeth's help. I decided to try to make a hot air balloon mobile (I have had a thing for hot air balloons lately for some reason), so I bought the supplies at Michael's, and we got started....


At first I thought I wanted to add punches of color instead of sticking with my gray, black, white, and yellow color-scheme...
but then I decided that I liked the more vintage-looking subtle balloons better, so I tamed them down to be only gray, white, and black, and I liked them much more....
I wasn't sure what to use for the baskets, but I ultimately chose burlap to give them that rustic/unfinished quality.

And after sewing the baskets on, the final touch was to add fun felt letters/#'s to add some interest.

(The $ is in reference to his middle name "Cash")

(The "V" is the initial of our last name)

And here is where the final picture would be, but.....I have yet to hang the mobile up - argh! I am sorry for the anti-climactic ending to this post, but I hope you like the look/idea as much as I do and will show you the completed project as soon as I post the nursery reveal :)


Have a cozy day!

-L

Tuesday, November 8, 2011

{The dresser is DONE!)

Continuing on in the nursery-decorating-maddness..... (YAY!)

Instead of using a standard changing table in our nursery, I really wanted to transform an old dresser into a fun, vibrant, stylish changing table/dresser. I just thought it would make more of a statement and would be more functional than open shelves with baskets, etc. I have seen a lot of this going on out there these days (I have shown you some pictures and have pinned several examples of some that I have loved), and knew that it was definitely something that I wanted for our little guys room. My hope is that it could transition into his big boy dresser someday too.

After searching for several weeks/months, I finally settled on this dresser that I found on Craigslist for $100...

(photo courtesy of the C.L. seller)

...kind of pricey, I know, but we don't seem to have an abundance of affordable vintage furniture around these parts like some of my FAVORITE people do, and this one was SUPER well made and had the straight, clean lines that I was looking for, so I pounced. Ali also pointed out to me that it had kind of an Asian flair, but my hope was that if it was all painted one color, that flair would go away, and it would just look stylish!

It sat in my garage for quite a while (longer than I planned on) before I felt like diving in. I was nervous. I really wanted to do this one all on my own, without the help of my Renaissance-Man brother in law who always ends up doing the hard work.

So....I began....

This dresser was definitely a fine piece of good quality craftsmanship -

engraved branding...


...and dove-tailed drawers...
(& I totally love the grandma contact paper - awesome!)


The first hiccup (that should have been a sign of doom) was that the little tiny screws that held the hinges on the cabinet doors were old and stripped, and I could not for the life of me get them off. UGH! So, the drawers would have to stay on while I painted which I knew was less than ideal.


The next true bonehead move I made was not going with my gut, but taking the word of a 20-something paint employee at Home Depot, telling me if I buy paint & primer in one, I shouldn't need to prime nor really sand anything. Um...DUH!! Was I just born yesterday?! He is dumb and I am an idiot for listening.

Here it is after 3 coats of paint (no sanding or priming of any kind). The bright yellow color had a greenish undertone due to the ugly brown color showing through. Also, the piping on every drawer made it impossible to get a smooth coat that didn't look stripey or clumpy in the grooves.....


I tried, I really did, but . . . .

*The rollers I chose had too high of a nap, so they left lint all over everything & the entire thing was a textured mess.
*The cabinet doors kept falling open and bonking the dresser while it was drying, causing dings the size of CA.
*Painted hinges are always pretty and functional, right??! :/
*I had no idea how I would paint the base of the thing, as there was no way I was going to be able to lift the thing up....!!!

It was a certified D-I-S-A-S-T-E-R!!!!!! I wish I could have flown Cassie out, as she is an expert in all things painted, and she would have surely knocked this one out of the park!! Needless to say, I called my brother in law with a major SOS, and he came to my rescue. Not only did he have to sand off basically EVERYTHING that I had done (*sigh), he then primed it, and painted it from top to bottom...

My hero! (seriously!)
(side note: he was able to get the cabinet doors off just fine - of course.)

After poly-ing it, he helped me bring it in, but we still needed to spray the hardware, and let the drawers finish drying, so here it sat for over a week, waiting....
...until it was finally done and ready to go.

Here it is all shiny and bright :)

What do you think!!!?? I am SO happy with how it turned out and am SOOOO lucky to have such a competent, helpful brother in law in my life. This dresser was a pain from start to finish, but in the end it was worth it and I am in L-O-V-E.

I hope you like it too! I am officially hanging up my brush (can) and most likely won't be attempting to paint/re-finish anything again for quite a while. I need a skills class before I try again.

I will master it though - someday!

:) Happy Tuesday!

-lisa